Having leggy seedlings can be a frustrating experience for gardeners who have carefully nurtured their plants from the very beginning. While many things can cause stretched-out, weak seedlings there are many ways to fix leggy seedlings. Let's explore the best ways how to fix leggy seedlings and promote healthy plants.
You started your seeds indoors, you thought you did everything right and then you look at your tall, leggy seedlings with dismay.
What went wrong?
It can be so discouraging to look at those tiny, spindly things... all stem and very few leaves. But, it happens to even the best of gardeners and the good news is, you can fix leggy plants most of the time.
What are leggy seedlings?
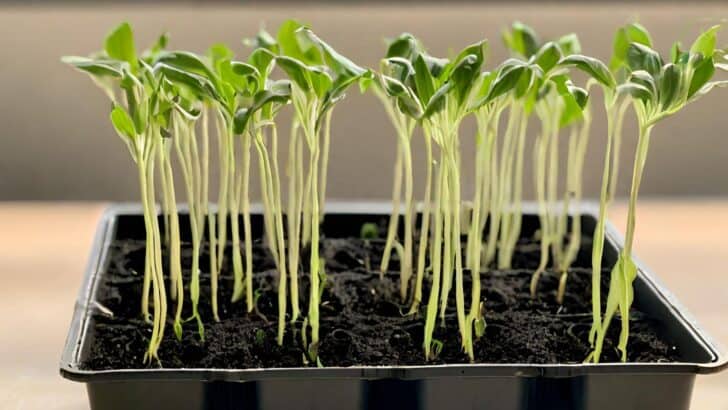
Seedlings are considered leggy when they grow tall, spindly, and weak looking. The taller the seedling is, the weaker the stem. These seedlings are typically very fragile with weak stems and may even appear yellow or whitish instead of green.
Are leggy seedlings bad?
They're not generally desirable, no. They become so skinny and tall that the fragile stems are prone to breakage, dampening off, and other damage. Especially when it comes to the outside elements like the wind.
While some plants are more forgiving than others and can be planted deeply when transplanted outside, others cannot and will just develop rotted stems.
So, it's best to prevent them from happening in the first place. Let's discuss some common causes of leggy seedlings.
What causes leggy seedlings?
There are multiple causes of leggy seedlings, but these are the most common issues that cause leggy seedlings.
Insufficient Light

One of the most common problems that results in leggy seedlings is insufficient light. Young, tender seedlings need adequate light to thrive. They will stretch to try to reach as much light as possible.
A lot of newer gardeners will stick seedlings in front of a south-facing window assuming it provides enough light. But often, this is not the case.
Many times seedlings set in a window will stretch so far sideways to try to get to the light, that they'll bend nearly in half attempting to do so. It's just not an ideal situation.
Seedlings need about 12-16 hours of direct sunlight every day, which the short days of winter do not typically provide. This makes utilizing artificial lighting via artificial grow lights necessary for most people.
But even using grow lights requires you to keep the lights close enough to the seedlings or they'll "reach" for the light and get taller and taller, creating weak stems.
Too Much Heat
Another common mistake is providing too much heat. If you leave the heating mats under your seedlings or don't remove the humidity dome as soon as they begin to sprout, the seedlings will react with a rapid growth spurt.
You'll wind up with tall stems way before the leaves have had a chance to grow.
Make sure to remove the humidity dome as soon as you see the first seedling sprouting above the soil surface. The rest of the seedlings will sprout without that dome in place.
Over Crowding

In the forest, plants will compete for light by growing taller. Seedlings are no different. So, if you just scatter those tiny seeds everywhere without utilizing proper spacing, the seedlings will try to grow above one another to reach the light.
While planting some seeds requires you just scatter them, as soon as the young seedlings have their first set of leaves, it's time to thin out the growth, reserving the seedling with the strongest stem for growth.
Erratic Watering
We all get busy, but keeping consistent moisture in your seed starting mix is essential. If it's often drying out before remembering to water it, you'll probably wind up with some leggy seedlings.
The seedlings will not be able to get the nutrients they need from dried-out soil, so they'll not be able to get the nice, sturdy stems they need to thrive and be strong plants.
To keep seedlings adequately moist, be sure to water every day or every other day. First, check the soil near the drainage holes. If the soil is dried out, water until it flows through those drainage holes.
Preventing Leggy Seedlings
Provide adequate light as soon as you see the young seedling sprout. It only requires a short amount of time before lack of light will severely affect the seedlings and they will stretch up seeking what they need to survive.
Use artificial grow lights. Most of the time when we are starting seeds in later winter and early spring, there isn't enough light for them to grow, even outdoors. Utilizing artificial grow lights will ensure that the light source is close enough and adequate for their needs.
Keep the light source close. Again, by utilizing artificial lights, you can make sure they're close enough so that the plants aren't stretching to get to the light source. Leave the grow lights 2" to 3" away from the top of the plants and provide seedlings with light 12 to 16 hours a day, every day.
Remove, or prop open humidity domes. As soon as you see the first signs of germination, even if only one seedling has broken the surface. If the dome is clear, you can keep it propped open until you see several sprouts, if you choose.
Provide enough water. Set up a regular watering routine of every day or every other day. Don't let the soil dry out completely and try to water from the bottom, not the top, for the best results.
How to Fix Leggy Seedlings
It happens to the best of us. Once you have floppy seedlings there's nothing you can do to prevent it, but thankfully, you can typically remedy the problem and have healthy seedlings.
Provide More Light

Maybe you aren't using a grow light, go ahead and set one up now. You'll want to make sure you're providing bright light by using a broad spectrum bulb with a minimum of 2,000 to 3,000 lumens per square foot of growing space.
Or maybe you are, but it's too far away, move it so it's closer to the plant. Or, if you're using a grow light that is close to the seedlings, try using a stronger bulb.
You can also try multiple lights, this is especially important if some of your trays are in the periphery of the light source. Or, switch out your seedling trays under different lights on different days.
Remove Humidity Domes and Heat Mats
Heat mats and humidity domes are utilized to speed up plant germination. Which, is great! But they're not necessary after you have some plants germinated and can encourage speeded-up growth... something you don't want when your plants are already looking a bit spindly and frail.
We keep heat mats under tomatoes, peppers, basil, and a few other things that need soil temps to stay on the warm side. But, that's where heat mats with thermostats come in. Setting a thermostat that will allow the mat to turn on when those soil temps drop below 65°F will make sure the soil stays warm enough without needlessly encouraging growth.
If your heat mats do not have a thermostat, I recommend pulling those as soon as you see germination, just like the humidity domes.
Use Proper Spacing
Once your seedlings develop their first true leaves, you'll want to make sure you don't have them closer than an inch or two apart.
If they're more crowded than that, you can try to separate them (a gentle process, but not impossible) or simply thin and keep only the strongest appearing seedling.
Water From Below
Spritzing your seedlings with the spray bottle regularly may seem to be enough, but it's probably not. There is no guarantee that water will reach through the starting mix.
By watering from the bottom, you'll ensure that the seed starting mix is pulling up the water it needs through the medium, which will encourage downward root growth.
Use Movement to Promote Strong Stems
A lot of people swear by putting a small oscillating fan on their seedlings. This can do multiple things, it encourages strong stem development because the seedlings have to deal with the constant air movement. It also can prevent some fungal issues and dampening off because there's adequate air flow around the seedlings.
If you don't have a fan, that's ok. You can simply gently brush your hands over the tops of your seedlings to promote those strong, thicker stems. Do this a few times a day for the best results.
Move Seedlings Outside ASAP
If your seedlings are leggy, you may want to transplant seedlings outdoors as soon as weather permits (depending on your USDA planting zone).
Be sure to harden off the seedlings and get them into the soil in the outdoor elements as soon as you can, but don't do it so soon that you cause transplant shock or run the risk of frost killing your crops.
If you transplant too early or have a freak frost, you can check this article out on tips to help protect plants from frost.
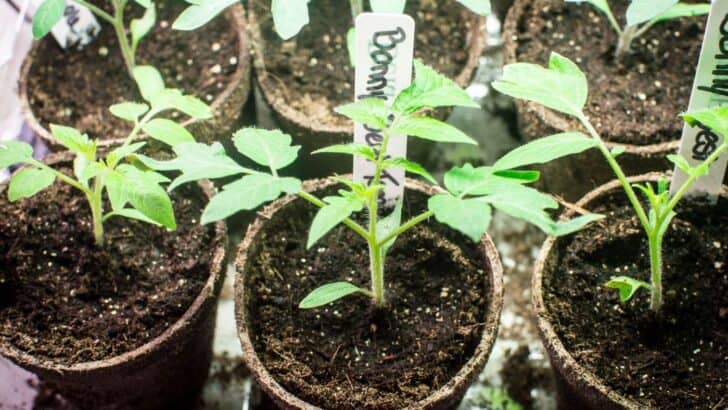
Transplant and Pot Up Tomato Plants

The best, and easiest, way to fix leggy tomato seedlings is to transplant the tomato plants to a larger container up to their lowest set of leaves. This will promote a strong root system and strong stems.
It is best practice to pot up your tomato seedlings to a larger pot at least twice before they're transplanted outside to develop the strongest root system and stem to best handle the weight of the mature plant and fruit.
This is one of the few plants that will benefit from this technique. Other plants that will benefit from this practice are peppers, eggplants, and tomatillos.
All in all, it's not the end of the world if your seedlings are a little on the spindly side. A bit of TLC and they're likely to bounce right back into healthy young plants that will grow bountifully in the garden.
Embrace Your Green Thumb With These Posts:
- 8 Vegetables You Should Start Indoors
- How to Stratify Seeds
- 13 Places to Buy Heirloom & Organic Seeds
Struggling with leggy seedlings? If this information helped you turn them around, I'd love to hear about it in the comment section below! Be sure to follow me on Pinterest and Facebook for more helpful gardening tips!


Jackie says
Hey there SIL! I love the new picture of you!!
Danielle McCoy says
Haha, thanks :).
Mrs B says
This is helpful, since I didn't get my lights set up as quickly as I should have!
I enjoy your blog! It's nice to know of another indiana homesteader!
Danielle McCoy says
Glad it helped! Our lights got set up late this year, too. Heck, everything has been a little late LOL. Happy gardening!!