
Tomatoes... are by far my favorite crop to grow. And like chickens, they seem to kind of be the gateway crop for vegetable gardeners big and small. However, knowing how to grow tomatoes can be confusing. There are few crops with as much variety as a tomato, but there are also few with as many potential problems and pests as tomato plants and fruits.
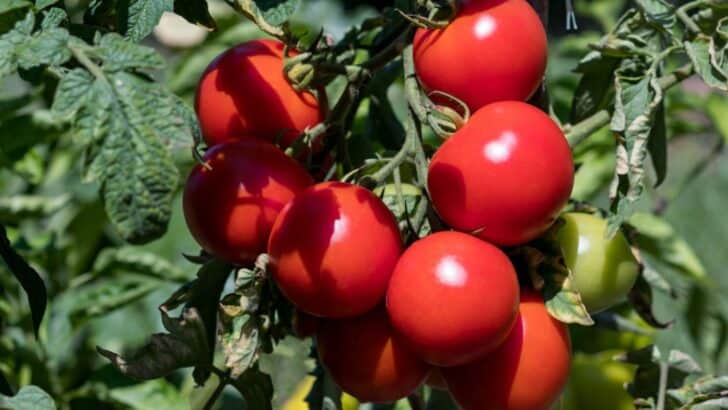
If you've never tasted a tomato fresh from the garden, you're missing out. Because of those things from the store? They ain't got nothin' on the deliciousness that is a real, bonafide, heirloom tomato fresh from the garden. And the variety available to gardeners is crazy big. They come in different colors, shapes, sizes, and more. Some are great for canning, others are better eaten fresh and still, others are best to make pastes and sauces.
How to Grow Tomatoes: A Complete Guide
Start From Seed and Use Heirloom Varieties

There are many differences between hybrid and heirloom seeds, but one of the main differences between tomato varieties is the produce. Heirloom varieties are plentiful and while not necessarily aesthetically pleasing like many hybrid seed varieties are, they're more flavorful.
Hybrid varieties of tomatoes were generally developed more for commercial crops than the home gardener. While there are some great hybrid varieties, none of them can beat the flavor and availability of different types of heirloom tomato seeds.
Starting from seed not only allows you to select various varieties to try but also helps you control the environment and the care of the seedlings from start to harvest making it more likely to grow an organic garden than buying starts at the store.
Plus, who doesn't like to play in the dirt when it's still cold outside?
Types of Tomato Plants Determinate VS. Indeterminate
When selecting your seeds, you will likely see in the description whether the variety is determinate or indeterminate. I generally grow a mixture of the two varieties.
Determinate tomato plants to reach a certain height and begin bearing fruit. They are generally smaller plants and will stop growing once their reach their predetermined height. They're great for container gardening and hanging plants.
Determinate varieties generally produce large amounts of fruit all at once. This is fantastic for canning. Because I'm not waiting to try to keep some tomatoes from rotting while waiting on others to ripen. I generally select all of my paste and tomatoes to can within determinate varieties. It makes canning days really busy, but it makes them less often. This means I'm not trying to keep the house cool while heating it up with canning stuff several times a week to keep the tomatoes canned up.
Indeterminate varieties are great for tomatoes you want to eat fresh. Beefsteak is a great example of this variety. These plants will keep growing and growing. You could be waiting quite a while before one single fruit shows up on an indeterminate plant. But, they will continue bearing fruit and growing larger the entire season instead of all of the fruit coming in at one time. These varieties require extra pruning once the lateral branches begin crowding in. If you don't prune off the excess branches, your harvest will not be very plentiful.
Tips for Starting Tomato Seeds
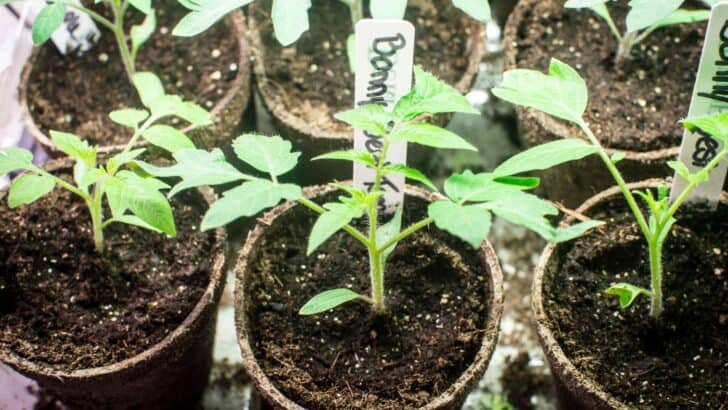
I never start my seeds for zone 5b until mid-March at the earliest. I've been known to start them in April. The rule of thumb is 6 weeks before the last expected frost. Which, in 5b is supposed to be May 1. However, that rarely happens. And when that doesn't happen and it's still 50 degrees out in the daytime, the plants can't survive. Try to make sure to be patient and start no sooner than 6 weeks before your last expected frost.
Tomatoes thrive on heat and light. So, you will need to provide plenty of both. We start ours on a heat mat along with our peppers. They do not need anything extra at this time, just starter mix and heat until they sprout.
Once they sprout, they will need light and that will replace the heat mat, so remove it. I use a grow light because they are a reliable source of UV light, unlike the unreliable spring weather. You'll have to watch the height of your plants versus your grow lights, though. It won't hurt the plants, but it can burn the leaves. So, make sure wherever you place the plants, that your light has plenty of room to move upward with the growing plants. This is another great reason not to start too early so you don't wind up with really tall plants before they can be transplanted outside.
Once your seeds have grown a little, make sure only one plant per 4-inch pot is in place. Thin out any extra plants. And keep them spaced out! Don't let the pots stay crowded together and allow the leaves to touch. This can result in leggy, elongated plants, which is not what you want. You want your seedlings to be short and stout.
Keep the soil moist, never dried out, but not drenched.
You can also add a fan if you'd like, once they start getting a little taller. This can help keep them hardy when they begin the hardening-off process before they're transplanted.
Warm the Soil Before You Transplant Tomato Seedlings
It's generally still on the cold (for tomatoes) side when the threat of frost is over. However, that doesn't mean the soil is adequately warm. You can artificially warm the soil by using a dark, plastic bag held down over the soil where the tomatoes will be planted for about two weeks before the transplanting date.
While transplanting tomatoes is pretty self-explanatory, there are some tips you can utilize for the best yields. You can read more about transplanting tomato seedlings here.
Mulch the Ground, but Not Yet
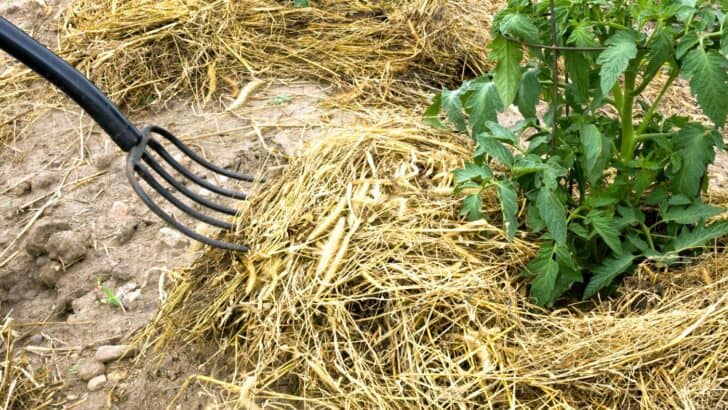
After you've hardened off the seedlings and added them to your garden, wait to mulch the area. Mulching helps keep the soil from drying out, keeps weeds around the plants to a minimum, and can prevent soil-borne diseases, but it also keeps the soil cool and shaded making it take longer to warm up.
Tomatoes like it warm and will not set fruit until the temperature is where they like it. So, allow the sun to continue warming up the area you set plastic in for just a few days before placing down mulch.
Prune Your Tomato Plants and Remove "Suckers"
Once your tomato plants are around 3 feet in height, you can prune them and remove the suckers to improve yields. Here's what I do:
- Remove all the leaves from the bottom 1 foot of the stem. These were the first leaves that grew out, get the least amount of light and air, and are the most prone to fungal disease outbreaks. They rarely bare the fruit of any consequence so it's worth removing them. An ounce of prevention.
- There are little leaves, called suckers, that grow in the joint of two branches. These will not bare fruit but will take energy from the plant. So, just pinch them off to prune the plant.
- I do not remove anything else at this time. The action of photosynthesis in the leaves is what gives the fruit its flavor. However, once indeterminate varieties start crowding their long, lateral leaves, I prune these back. If you do not keep them pruned to prevent overcrowding, they will not set much fruit at all.
Keep Your Tomato Plants Watered Deeply and Regularly
A lot of people overwater, or underwater, their tomato plants. This results in split fruit or blossom end rot. I get so irritated when I go out and find all of that beautiful fruit with huge splits in it.
Watering once or twice a week, about two gallons per plant is the best way to water tomatoes. Allow time for the soil to dry out between watering. This is also where the mulch you delayed putting down comes in handy because it will keep the moisture in the soil where it needs to be.
Also, make sure you aren't watering irregularly. Irregular watering generally leads to overwatering and overwatering leads to disease and fruit you have to throw at the chickens.
Overwatering will result in the split fruit we all can't stand. Underwatering often results in calcium deficiency and results in blossom end rot. So, keep them watered, but not too much.
Harvesting Tomatoes
You have beautiful, ripe fruit ready to harvest. Go grab it! Tomatoes should be harvested as soon as they're ready. If you have determinate varieties, you probably have a bunch all at once. Grab them and wash them to get them ready for canning or sale or eating, whatever you intend to do with them. Indeterminate varieties generally don't ripen all at once, and I love eating them freshly sliced with just a touch of sea salt.
If you aren't canning them, you can store them for about a week on the counter without any problems. If you put them in the refrigerator, they'll likely not be as flavorful and probably be a bit on the mushy side.
If they aren't quite ripe, but you're ready to harvest, go ahead and grab them and put them in a windowsill to allow them to ripen before using them.
Tomatoes aren't difficult to grow, but they do require some finesse. They're well worth the work you have to put into them and will provide you with plenty of delicious tasting fruit for most of the summer, and beyond if you can them. And nothing, I mean nothing, beats the taste of a fresh, garden tomato.


Leave a Reply