Making your own chicken stock is one of the easiest ways to turn simple ingredients into real, nourishing food. Below you’ll learn how to make and can chicken stock so it’s ready on your pantry shelf whenever you need it.

Homemade chicken stock is one of those quiet kitchen skills that changes everything.
It turns scraps into nourishment, stretches meals further, and brings depth and richness you simply can’t get from a box on the store shelf. It’s the foundation of good cooking. From soups to gravies, rice, and even sauces. Once you start making it yourself, you’ll wonder why you ever bought it.
This rich, gelatin-filled stock is often called chicken broth, and for everyday use the terms are interchangeable. Traditionally, though, stock is made from bones and cooked longer, which is exactly what we’re doing here.
And yes, you can safely pressure can chicken stock so it’s ready on your shelf whenever you need it.
Chicken Stock vs. Chicken Broth (What’s the Difference?)

If you’ve ever pulled a jar of homemade stock from the fridge and found it fully gelled, you already understand the difference.
- Chicken stock
- Made primarily from bones
- Longer cooking time
- High in natural gelatin
- Rich, full-bodied texture
- Chicken broth
- Made with more meat
- Shorter simmer
- Lighter flavor and body
For home cooks, especially those canning, the distinction isn’t critical, both are pressure canned the same way. But if you’re using carcasses, backs, necks, and feet and cooking them low and slow, what you’re making is properly called stock.
Why Make Your Own Chicken Stock?
This isn’t about trends or “superfoods.” This is about good stewardship and real food.
- Uses the whole bird. Carcasses, necks, backs, and the best part... feet.
- Naturally rich in gelatin from collagen in the bones.
- Deep flavor without additives or fillers.
- Far cheaper than store-bought broth.
- Shelf-stable when canned, freeing up freezer space.
It’s the kind of kitchen habit our grandmothers didn’t think twice about, because it just made sense.
Best Chicken Parts for Rich Stock
You don’t need anything fancy, but bone variety matters.
Excellent options:
- Roasted chicken carcasses
- Backs and necks
- Wings
- Chicken feet (optional, but unmatched for gelatin)
Feet might look strange, but they’re one of the best additions you can make if you want a truly rich stock.
Ingredients for Homemade Chicken Stock

This chicken stock is made the traditional way — from bones, aromatics, and time. Exact amounts aren’t critical, and you can adjust based on what you have on hand.
- Chicken bones (carcasses, backs, necks, wings, or feet)
- Cold water (enough to fully cover the bones)
- A small splash (or “glug”) of apple cider vinegar
- Onion tops or whole onion, roughly chopped
- Celery stalks and leaves
- Carrots
- Garlic cloves
- Bay leaf
- Fresh or dried thyme
- Fresh or dried rosemary
- Whole peppercorns
- Salt (added after cooking, before use or canning)
Note on seasoning:
Salt is best added after the stock is finished. This allows you to control the final flavor and keeps the stock flexible for soups, sauces, and gravies. Light seasoning before canning is fine, but many home cooks prefer to leave it unsalted and season when using.
Supplies Needed
- Large stockpot, slow cooker, or instant pot
- Fine mesh strainer
- Pressure canner
- Canning jars, lids, and rings
- Ladle and basic canning tools
How to Make Chicken Stock

Roast the Bones. (Optional, but Recommended). For deeper flavor, roast bones at 400°F for 30 to 40 minutes, until golden brown. This step isn’t required, but it makes a noticeable difference.
Simmer Low and Slow. Place bones in your pot and cover completely with cold water. Add vinegar.
Stovetop: Bring to a gentle boil, reduce to a low simmer, and cook 8–24 hours.
Slow Cooker: Cook on low 12 to 24 hours.
Instant Pot: Cook on high pressure 120 minutes, then allow a natural release.
Add vegetables during the last hour or so, so they don’t turn bitter.
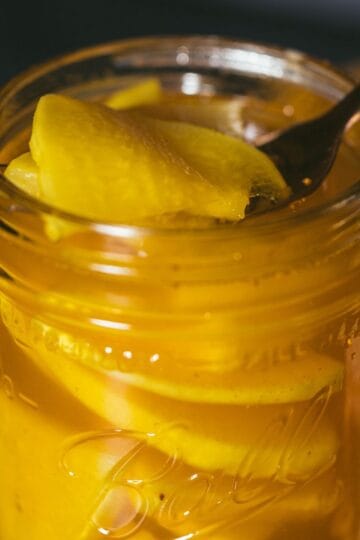
Strain and Chill. Strain out bones and solids. Cool the stock quickly. Once cold, remove the solidified fat from the top. At this point, your stock should be deeply colored and gel when refrigerated.
How to Can Chicken Stock Safely
Chicken stock is a low-acid food and must be pressure canned.
Reheat the Stock. Bring the defatted stock back to a full boil before canning.
Prepare Jars and Canner. Wash jars and keep them hot. Prepare lids according to manufacturer instructions.
Fill the Jars. Ladle hot stock into jars, leaving 1 inch headspace. Wipe rims, apply lids, and tighten bands fingertip-tight.
Process in a Pressure Canner. Vent steam for 10 minutes, then apply the weight.
- Pints: 20 minutes
- Quarts: 25 minutes
- Pressure:
- 10 lbs (weighted gauge)
- 11 lbs (dial gauge)
- Adjust for altitude as required
Cool and Store. Allow pressure to return to zero naturally. Let jars rest 12–24 hours. Check seals, remove rings, label, and store. Properly canned chicken stock is shelf-stable for at least 18 months.
How to Use Homemade Chicken Stock

- Soup and stew bases
- Cooking rice, beans, or grains
- Gravies and sauces
- Braising meats
- Sipping warm during illness
This is one of those staples that quietly supports dozens of meals without ever calling attention to itself.
📖 Recipe

Homemade Chicken Stock (Pressure Canned or Fresh)
A rich, traditional chicken stock made from bones, aromatics, and time. This deeply flavorful stock is naturally gelatin-rich, perfect for soups, gravies, and everyday cooking. Includes instructions for both fresh use and pressure canning.
Ingredients
- Chicken bones (carcasses, backs, necks, wings, and/or feet)
- Cold water (enough to fully cover bones)
- 2 tablespoons apple cider vinegar
- Onion tops or 1 whole onion, roughly chopped
- 3 celery stalks (leaves included)
- 3 carrots
- 4 garlic cloves, smashed
- 1 bay leaf
- 1 ½ teaspoons dried thyme or a few fresh sprigs
- 1 teaspoon dried rosemary or a small fresh sprig
- 2 teaspoons whole peppercorns
- Salt, to taste (added after cooking)
Instructions
- Roast the Bones (optional). For deeper flavor, roast chicken bones at 400°F for 30–40 minutes, until lightly browned.
- Build the Stock Place bones in a large stockpot, slow cooker, or electric pressure cooker. Add cold water to fully cover the bones. Stir in the apple cider vinegar.
- Simmer
Stovetop: Bring to a boil, reduce to a gentle simmer, and cook 8–24 hours.
Slow Cooker: Cook on low 12–24 hours.
Instant Pot: Cook on high pressure for 120 minutes, then allow natural release. - Strain and Cool Remove bones and solids. Strain stock through a fine mesh strainer. Cool quickly and refrigerate.
- Remove Fat Once fully chilled, skim off and discard or save the hardened fat.
- Season. Add salt to taste after cooking, or leave unsalted for canning.
For Pressure Canning - Bring stock back to a full boil.
- Ladle hot stock into hot jars, leaving 1 inch headspace.
- Wipe rims, apply lids, and tighten bands fingertip-tight.
- Process in a pressure canner at 10 lbs (weighted) or 11 lbs (dial) adjusting for altitude:
Pints: 20 minutes
Quarts: 25 minutes - Allow canner to cool naturally. Let jars rest 12–24 hours before checking seals.
Notes
- 0–1,000 ft:
- 10 lbs (weighted gauge)
- 11 lbs (dial gauge)
- 1,001–8,000 ft:
- 15 lbs (weighted gauge)
- 12–15 lbs (dial gauge, according to manufacturer)
Nutrition Information:
Yield:
16Serving Size:
1Amount Per Serving: Calories: 9Total Fat: 0gSaturated Fat: 0gUnsaturated Fat: 0gSodium: 12mgCarbohydrates: 2gFiber: 1gSugar: 0gProtein: 0g
Nutrition information is automatically calculated and is not guaranteed to be accurate. I’m not a nutritionist... just a home cook sharing what works in my kitchen. Please use your preferred calculator if you need exact values for dietary needs or medical conditions.


Bec says
I like to use a lot more vegetables in my bone broth. I save all sorts of veggie scraps. Will that affect my pressure cooking time?
What is the vinegar for?
Does this broth congeal? I cook mine down and when it cools it is kinda gelish
Thank you for posting you process!
Danielle McCoy says
You can use anything you want and the pressure cooking time will be the same. This broth does congeal. The vinegar is actually used to help pull the collagen out of the connective tissues and is said to result in a more mineral rich broth. It also makes it more flavorful. You can also use wine instead of cider vinegar, but I wouldn't use regular white vinegar. Hope that helps!
Misha says
How long does it last When canned?
Love the recipe!
Danielle McCoy says
They'll keep for at least 18 months stored properly. As long as the seal isn't broken they will keep for a long while.
Rhonda says
Wondering how you could use the fat that you skim from the top ...
Danielle McCoy says
You could cook with it... use it in place of butter, lard, etc.
Caroline says
Can you can the jars in a water bath? If so, how long would you leave them to process on the stove?
Danielle McCoy says
No, you have to process in a pressure canner.
Marilyn says
Why do you skim the fat off before canning the bone broth? Why can you not leave the fat in?
Danielle McCoy says
The layer of fat changes the integrity and flavors of the broth so it's generally recommended to preserve the flavor that the layer of fat is removed.
Suzie says
you recommended roasting the bones before you make the broth. Can you please give instructions on how to do this? I'm knew to canning never done it before.
Danielle McCoy says
I mentioned at the top of the recipe card to place them in a preheated 350F oven for 30 minutes :).
Kaydotty says
Hello, I don't use vinegar in my bone broth, can I still follow these canning directions or would that change it because ACV would affect the acidity?
Danielle McCoy says
It will be canned the same.
April says
First time I have ever made bone broth. Used your recipe and it was basil delicious. Question, how long do you process quart jars for?? Thanks april in arkansas
Danielle McCoy says
Quart jars are processed for 25 minutes.
April says
How long do you have to process quart jars? I made this exact recipe and it is absolutely delicious. I was concerned the entire time I wasn’t doing it right. My first time to make/can bone broth. Yummy, thanks for sharing. 😊
Danielle McCoy says
Quarts are processed at 10 lbs of pressure, adjusting for altitude, for 25 minutes.
Desiree Desiree says
Hi! Looking forward to making this recipe. Thoughts on using an instant pot? I have a lot of bones in my freezer- at 2lbs per batch it will take forever.
Danielle McCoy says
You could use it to make the broth, but I don't know how much nutrition will transfer into the actual broth since you're pressure cooking it. If I had a ton, I'd probably get a really large kettle with a burner (like for a crawfish boil) and do them that way.
Cheryl says
I've been making bone broth for years and I've always frozen it. I just pressure canned chicken bone broth for the first time. I have read that you need to boil any home canned low acid foods for 10 Minutes before you consume them, but when I do that it burns the bone broth. Do I really have to boil it that long? I have looked all over the web and I can't find an answer. Thank you so much
Danielle McCoy says
I've never heard that, nor do I find it necessary. As long as you followed directions and pressure canned the food properly, it's safe even unwarmed.