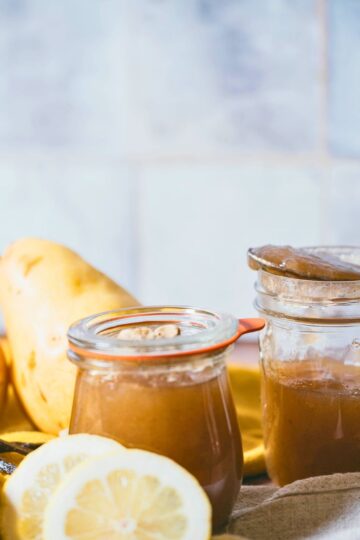
Homemade raspberry jam should taste like summer... sun-warmed, wild, just a little tart, and sweet enough to make your eyes close.

Most raspberry jam recipes will tell you to mash some berries, toss in sugar, and call it good. And sure, it’ll set. But will it sing?
This one’s got a little more soul.
A whisper of lime zest brightens the tartness. A splash of amaretto brings just enough warmth to make you wonder what magic’s in the jar. Still ruby-red and familiar... just deeper, richer, and a little wild.
It’s the kind of thing you eat on toast with your fingers. Stir into yogurt. Bake into a tart. Or hide from your family behind the sourdough crock in the fridge.
Why You’ll Love This Raspberry Jam

Forget fruit & sugar. The amaretto and lime zest take this from basic to unforgettable.
It’s tart and sweet with just enough warmth to make people pause between bites and say, “wait… what’s in this?”
No pectin required. Raspberries have enough of their own. You just have to give it time and heat.
Works with fresh or frozen berries. Backyard harvest? Wild-picked? Aldi bag? Doesn’t matter.
It’s not cloyingly sweet. You get that rich, ruby berry flavor without it tasting like candy.
A little something extra. The amaretto and lime zest aren’t overpowering, but they do make it special. It still tastes like raspberries, just… better.
Ingredients

- 9 cups mashed raspberries
- 5 cups granulated sugar
Want to level up your jam? Add:
- Zest of ½ lime (for brightness)
- 1–2 teaspoons amaretto (for warmth & a whisper of almond)
Stir them in after cooking, just before jarring. It’s subtle, elegant, and utterly addictive.
How to Make Raspberry Jam

Prep your jars. If canning, get your water bath canner simmering. Wash your jars, lids, and rings.
Mash your berries. Toss the raspberries into a heavy-bottomed pot and mash them. Use a potato masher, immersion blender, or whatever you have on hand. Bring to a boil and let it go for a full minute.

Add the sugar. Add your sugar (warm it in the oven if you want it to dissolve faster) and stir to combine. Bring to a rolling boil that you can’t stir down. Boil hard for about 5–7 minutes, stirring constantly.
Gel test tip: Dip a cold metal spoon in. If the jam slides off in twin drips or hangs thickly, it’s ready.

Step 4: Add your extras. Once off the heat, stir in your lime zest, amaretto, or vanilla... whatever magic you’re using.
Step 5: Ladle & process. Ladle hot jam into jars, leaving ¼" headspace. Wipe rims, place lids, screw bands fingertip-tight. Process in a boiling water bath for 10 minutes. Let sit undisturbed 12–24 hours.
Storage Tips
- Sealed jars keep for 12–18 months in a cool, dark pantry.
- Opened jars should be refrigerated and used within 2–3 months.
- Don’t stack jars while storing... it can weaken seals over time.
Troubleshooting
Runny jam? It likely needs more boiling time. You can reprocess with added lemon juice & sugar, or just use it as a sauce.
Too thick? Thin it with a splash of hot juice, port, or water before serving. It’s still gold.
This isn’t about perfection. It’s about presence.
About standing over a bubbling pot with stained fingers, and knowing you’ve captured a little piece of now to open in February.
Whether it’s a morning biscuit or a late-night spoonful, this jam’s here to remind you: you made this.
If you like this, you'll want to try these next:
- Homemade Christmas Jam
- Strawberry Preserves with Honey & Vanilla
- The Best Blackberry Jam Recipe (without Pectin)
📖 Recipe

Raspberry Jam with Lime & Amaretto (No Pectin)
This raspberry jam is simple, bold, and just a little wild. No pectin required... just raspberries, sugar, a touch of lime zest, and a splash of amaretto for warmth. It’s everything summer jam should be: bright, ruby-red, and unforgettable.
Ingredients
- 9 Cups Raspberries (about 2½ - 3 lbs whole berries)
- 5 Cups Sugar
- Zest of ½ lime
- 1 tablespoon Amaretto
Instructions
- Prep jars and canner. If canning, fill your water bath canner and start heating. Wash jars, lids, and rings. Keep warm.
- Mash berries. Add raspberries to a heavy-bottomed pot. Mash with a potato masher or blend slightly for smoother texture. Bring to a boil and boil hard for 1 minute.
- Add sugar. Stir in sugar (warm in oven first for quicker dissolving if desired). Return to a rolling boil you can’t stir down. Boil hard, stirring constantly, for 5–7 minutes or until gel stage is reached.
- Test for gel. Dip a cold metal spoon in the jam. If it drips in thick sheets or twin drops, it’s ready.
- Stir in lime zest and amaretto. Remove pot from heat. Stir in lime zest and amaretto, if using.
- Ladle and process. Fill hot jars, leaving ¼-inch headspace. Wipe rims, add lids, and screw bands fingertip-tight. Process in a boiling water bath for 10 minutes. Let rest 12–24 hours before storing.
Notes
Always adjust your processing time based on your elevation to ensure a safe seal.
Nutrition Information:
Yield:
60Serving Size:
1 TablespoonAmount Per Serving: Calories: 75Total Fat: 0gSaturated Fat: 0gTrans Fat: 0gUnsaturated Fat: 0gCholesterol: 0mgSodium: 0mgCarbohydrates: 19gFiber: 1gSugar: 18gProtein: 0g
Nutrition information is automatically calculated and is not guaranteed to be accurate. I’m not a nutritionist... just a home cook sharing what works in my kitchen. Please use your preferred calculator if you need exact values for dietary needs or medical conditions.


Alisa says
Do I store on my canning shelf or in my freezer?
Danielle McCoy says
shelf
Diana Ribera says
Would the process change at all for a steam canner?
Danielle McCoy says
No. Process for the same time.
Brenda Pizzino says
This came out great!!y
Danielle McCoy says
So glad you enjoyed it!
Marlee says
I see your note for how long it lasts refrigerated and frozen, if not canned. Could you tell me how long it will last if it is processed and canned? Thank you so much! We look forward to trying it.
Danielle McCoy says
12 to 18 months canned.
C says
If the jam gets left out in the pot overnight, is it still okay to throw in a container and throw in the fridge? Or is it bad at this point? So upset
Danielle McCoy says
If it was kept cool and it was dark, you could get by with keeping it in the refrigerator for about a week after. You cannot can it, though.
Ginny says
Does this recipe work if you do a double batch?
Danielle McCoy says
I wouldn't double it, I would make two batches instead.
Eileen says
Can i use less sugar? I don't want really sweet jam.
Danielle McCoy says
Possibly, no guarantees it will set up.