There’s something ancient about standing over a pile of cucumbers with a knife in hand and vinegar on the stove. A quiet ritual. A reclaiming. These easy homemade dill pickles are sharp, salty, and just the right kind of sour. No weird fillers. No store-bought shortcuts. Just brine, garlic, and the crunch of a summer harvest tucked into jars.
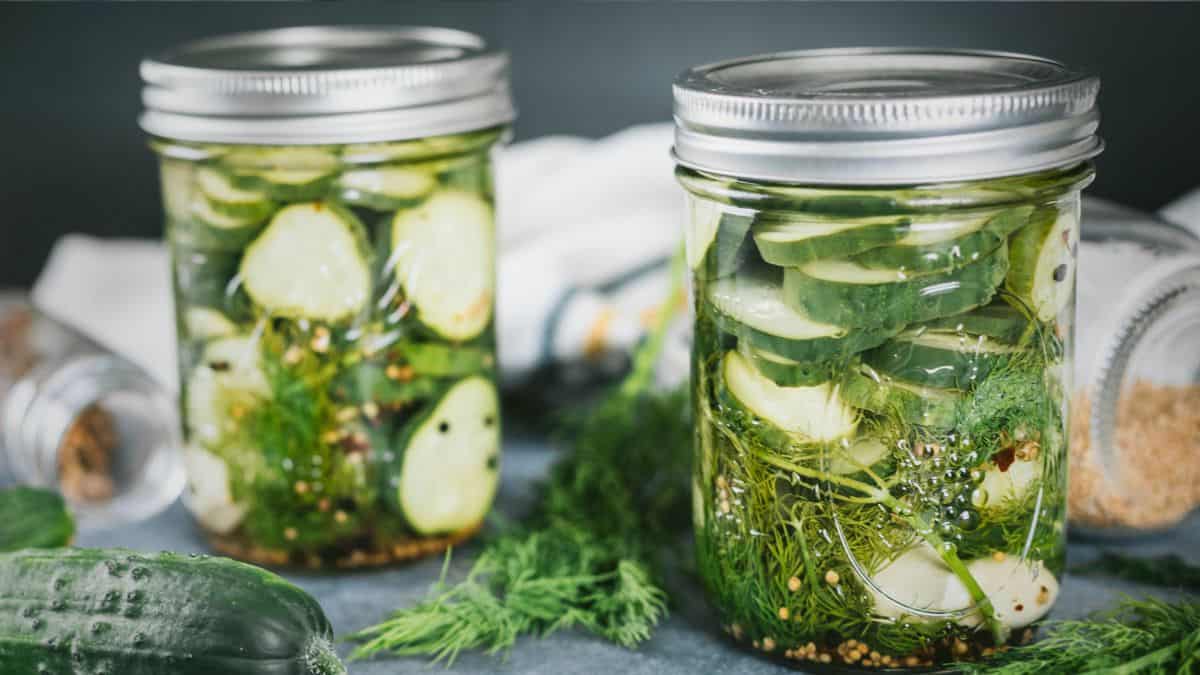
They’re the kind of pickles that belong next to a burger, straight out of the fridge, or eaten from the jar when the kitchen’s gone quiet. This is the recipe I come back to every single year—and the one that never lasts long on the shelf.
The Best Cucumbers for Dill Pickles
If you want a crisp pickle, it starts with the right cucumber.
Pickling cucumbers, sometimes called Kirby cucumbers at the store, are bred for this job. Thicker skin. Firmer flesh. They hold up in brine like they were made for it, because they were.
Fresh is everything. Don’t bother with limp or overgrown cukes. If you're pulling them from your own garden, pick them small and store them cold until you're ready. And always, always, cut off the blossom end. There’s an enzyme in that tip that’ll soften your pickles before they ever get a chance to shine.
Ingredients for the Best Homemade Dill Pickles
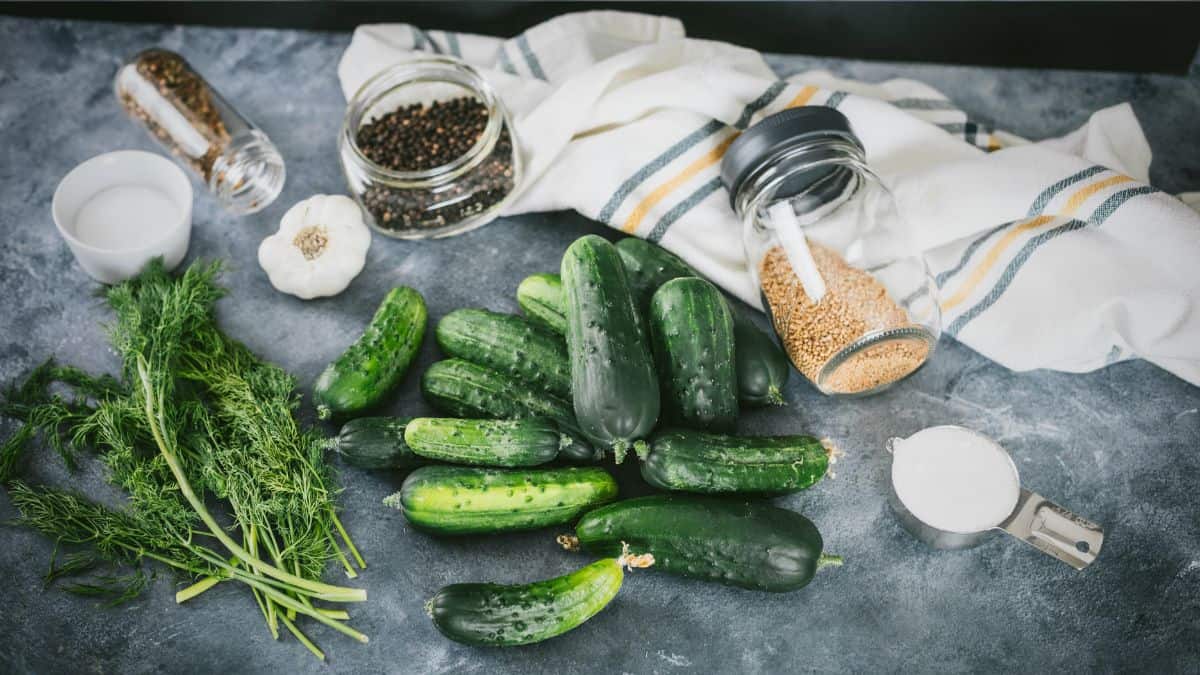
This is what you'll need to turn a pile of cucumbers into something you’ll crave straight from the jar:
- Pickling Cucumbers. Firm and fresh. Look for Kirby cucumbers or anything labeled “pickling.” Thicker skin, crisp bite.
- White Vinegar. Classic, clean flavor. Go with 5% acidity. You can swap for apple cider vinegar, but expect a tangier twist.
- Filtered Water. Use clean, cold water to keep your brine bright and your pickles from clouding.
- Pickling Salt. Also called canning salt. No additives, no weird aftertaste. Sea salt or kosher salt will work in a pinch (just make sure it’s non-iodized).
- Cane Sugar. Just enough to mellow the tang. Not sweet pickles. Just balanced. Optional, but worth it.
- Fresh Garlic. A couple of cloves per jar, smashed. Essential. You want that bite.
- Fresh Dill. Feathery, fragrant, and way better than dried or seed. Get it fresh if you can.
- Pickling Spice, Mustard Seed & Black Peppercorns. For depth. You can keep it simple with just dill and garlic, but this blend adds nuance.
- (Optional) Pickle Crisp. If you’re canning and want that extra crunch, it’s a worthy addition.
This will make about 4 pints, but the recipe is easy to scale up or down depending on your harvest (or your craving).
How to Slice Cucumbers for the Best Pickles
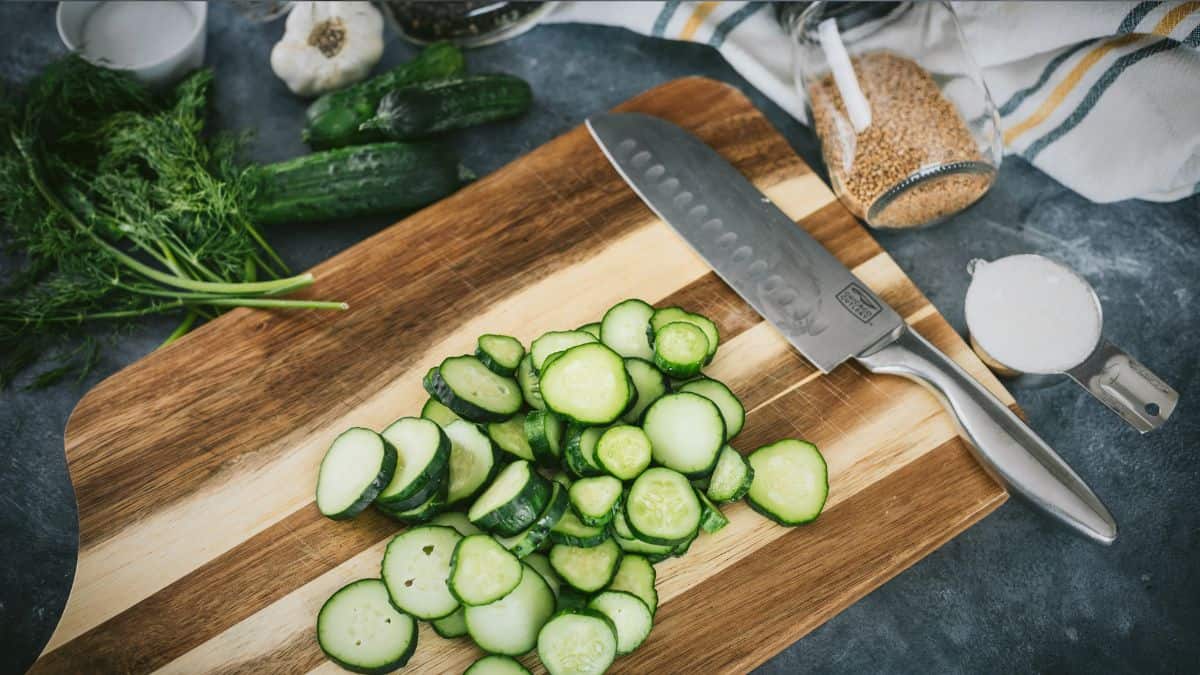
Start by trimming at least ¼ inch off the blossom end of each cucumber. That end harbors enzymes that soften the fruit over time—skip this step, and you’ll end up with limp pickles no matter how perfect your brine is.
Once trimmed, it’s your call:
- Spears for burgers, snacking, and stacking on charcuterie boards.
- Chips for sandwiches or that perfect crunchy bite.
- Whole if they’re small and you’ve got the patience. They’ll take longer to cure, but they stay extra crisp.
Keep them uniform in size so they brine evenly. If you're canning, it helps to pack tighter and avoid floaters. If you're just tossing them in the fridge, let your mood decide.
How to Make Refrigerator Dill Pickles
If you’ve got 20 minutes, a few jars, and a craving for something crisp, salty, and a little sour, you’ve got time to make these. No canner. No drama. Just real food, made simple.
Sterilize your jars. Give your jars a good wash in hot, soapy water. If you’ve got time, boil them for 10 minutes—or just run them through the dishwasher on high heat. Clean jars matter, even if you’re not sealing them.
Make the brine. In a saucepan, bring vinegar, water, salt, and sugar to a rolling boil. Stir until everything dissolves. Then kill the heat and let it cool to room temp. A hot brine can cook your cukes, and we’re not here for soggy pickles.
Prep your add-ins. Smash a few garlic cloves. Snip fresh dill into sprigs. Measure out your spices... mustard seed, peppercorns, maybe a dash of homemade pickling spice if you’re feeling fancy.
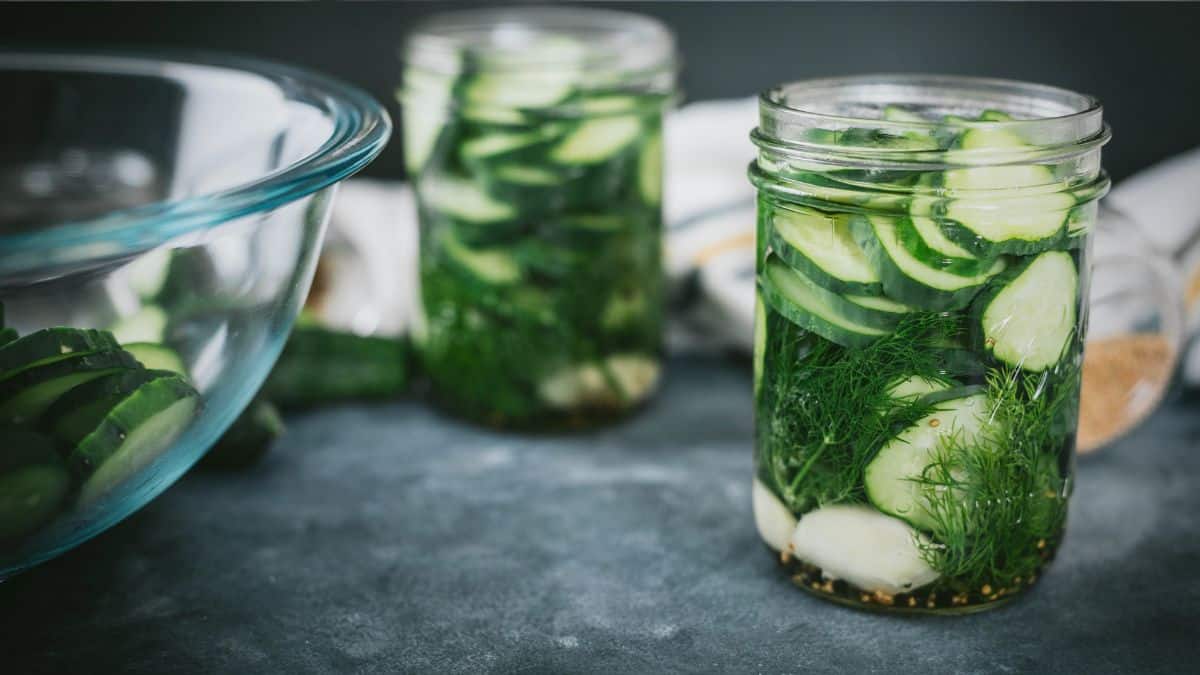
Pack the jars. Into each jar, layer your dill, garlic, and spices, then tightly pack in your sliced cucumbers. Pour the cooled brine over everything, leaving a little headspace at the top.
Chill & wait. Lid those jars and stash them in the fridge. Two days gets you pickles. A week gets you great ones. Shake the jar now and then to keep the flavor moving.
How to Can Dill Pickles (Shelf-Stable)
Refrigerator pickles are quick and easy, but there’s something soul-satisfying about lining a pantry shelf with jars that’ll last you all winter. Canning takes a little more effort, but it’s worth it. Every jar is a small act of rebellion... food security in glass.
Slice & soak the cucumbers. Cut your cucumbers however you like them... chips, spears, or halves. Then drop them in a large bowl, sprinkle with ½ cup of pickling salt, and cover with ice water. Let them sit in the fridge for at least 2 hours. This saltwater soak helps keep them firm, even months later.
Drain and rinse thoroughly before packing.
Prep jars & gear. Wash your pint jars, lids, and bands in hot soapy water. Fill your water bath canner and bring it to about 180°F... steamy but not boiling. Keep the jars hot until you’re ready to fill them. This helps prevent cracking when the hot brine hits.
Make the brine. In a large pot, combine your vinegar, water, salt, and sugar. Bring it to a gentle boil, stirring to dissolve everything. Keep it hot on the stove while you work.
Pack the jars. Into each hot pint jar, add:
- 2 garlic cloves
- ½ teaspoon each of mustard seed, black peppercorns, and pickling spice
- ⅛ teaspoon Pickle Crisp (optional, but worth it)
- 4 sprigs of fresh dill
Pack your cucumbers in snugly, leaving ½" headspace. Pour the hot brine over the top and remove air bubbles with a chopstick or bubble remover. Adjust brine if needed to maintain headspace.
Lid & process. Wipe the rims, apply lids, and screw bands on fingertip tight. Submerge jars in the hot water canner, ensuring they’re covered by at least 1" of water. Bring to a full boil and process for 10 minutes (adjust for altitude if needed).
Turn off the heat, remove the lid, and let jars rest in the canner for 5 minutes before moving to a towel-lined counter. Let them sit for 12 hours, then check seals, remove rings, and stash in a cool, dark pantry.
How to Store Homemade Dill Pickles
Whether you’re stashing a quick batch in the fridge or tucking away jars for winter, the key to keeping pickles at their best is proper storage.
Refrigerator Pickles
These keep beautifully for 2 to 3 months, though we’ve had them last up to 5 or 6. Just make sure they’re always submerged in brine and stored in a cold fridge. Over time they’ll mellow and soften a bit, but the flavor? Still sharp and satisfying.
Canned Pickles
Properly sealed jars will hold strong for 12 to 18 months in a cool, dark spot like a pantry or cellar. No need to refrigerate until opened. Once opened, keep them in the fridge and eat within a few weeks for the best texture and bite.
How to Use Dill Pickles
These aren’t just for burgers (though they’re damn good on one). Homemade dill pickles bring crisp, briny flavor to so many everyday meals. Here’s how we put ours to work:
- Pile onto grilled venison burgers or tuck into sandwiches for a tangy crunch.
- Serve on a charcuterie board next to cured meats and sharp cheese.
- Chop into potato salad or egg salad for a briny bite.
- Slice and dehydrate for a salty, satisfying snack.
- Fry ‘em in a light cornmeal crust for the ultimate summer side.
- Blend into pickle dip or stir into deviled eggs.
- Top hot dogs or sausages with a spear and a smear of mustard.
If you’ve got a jar, you’ve got options, and none of them involve letting them sit forgotten on a fridge shelf.
📖 Recipe

Easy Homemade Dill Pickles (Refrigerator or Canned)
Crisp, briny, and full of summer bite, these dill pickles are everything a good pickle should be. Whether you tuck them into burgers, serve them on a board, or eat them straight from the jar with the fridge door still open, they’re simple to make and built to last... just like the best kitchen traditions.
Ingredients
- 4 lbs Pickling Cucumbers
- 2 teaspoon Pickling Spice (divided)
- 2 teaspoon Mustard Seed (divided)
- 2 teaspoon Peppercorns (divided)
- 8 Garlic Cloves (divided)
- 12 Sprigs Fresh Dill (divided)
- 4 Cups Water
- 3 Cups White Vinegar
- ½ Cup Granulated Sugar
- 4 tablespoon Pickling Salt
- ½ teaspoon Pickle Crisp (divided, optional)
Instructions
To Make Refrigerator Dill Pickles:
- Sterilize jars using hot soapy water and a 10-minute boil, or a high-heat dishwasher cycle.
- Make the brine: In a saucepan, combine 3 cups water, 3 cups white vinegar (5% acidity), 1 ½ tablespoons canning salt, and 1 tablespoon sugar. Bring to a boil. Stir to dissolve. Let cool.
- Prep the cucumbers: Trim ¼” from blossom end of each pickling cucumber. Slice into spears, chips, or leave whole.
- Pack the jars: To each clean pint jar, add:
½ teaspoon yellow mustard seeds
½ teaspoon black peppercorns
½ teaspoon pickling spice
2 peeled, smashed garlic cloves
4 fresh dill sprigs
Then pack in cucumbers tightly. - Pour the brine over the cucumbers, leaving ½” headspace.
- Wipe rims, seal with lids, and refrigerate for at least 48 hours—ideally a week for full flavor.
To Can Dill Pickles for Shelf Storage:
- Slice + Soak cucumbers in ice water with ½ cup canning salt for 2 hours. Drain and rinse thoroughly.
- Sterilize jars and keep them hot in a water bath canner at 180°F.
- Make the brine as above, and keep hot.
- Add to each pint jar:
2 garlic cloves
½ teaspoon mustard seed
½ teaspoon black peppercorns
½ teaspoon pickling spice
4 dill sprigs
⅛ teaspoon Pickle Crisp (optional)
Fill with cucumber slices, leaving ½” headspace.
Pour hot brine over cucumbers. Remove bubbles. Adjust headspace. Wipe rims. Seal with lids. - Process in a boiling water bath for 10 minutes (adjust for altitude).
- Turn off heat, let jars rest 5 minutes, then move to a towel-lined counter. Check seals after 12 hours. Remove rings and store.
Notes
Try adding sliced jalapeños, red pepper flakes, or extra garlic if you like heat or bite.
Processing Times:
- 1,000 ft & Below 10 Minutes
- 1,001 ft - 3,000 ft 15 Minutes
- 3,001 - 6,000 ft 20 Minutes
- 6,001 ft + 25 Minutes
Nutrition Information:
Yield:
8Serving Size:
1 CupAmount Per Serving: Calories: 96Total Fat: 1gSaturated Fat: 0gTrans Fat: 0gUnsaturated Fat: 1gCholesterol: 0mgSodium: 101mgCarbohydrates: 17gFiber: 1gSugar: 13gProtein: 1g


Margarette says
Hi there! Liking this recipe but wondering if you used pints or quart jars for this recipe??
Danielle McCoy says
Hi there! I’m so glad you’re enjoying the recipe! For this dill pickle recipe, I used pint jars. They’re the perfect size for pickles and make it easy to store and enjoy them