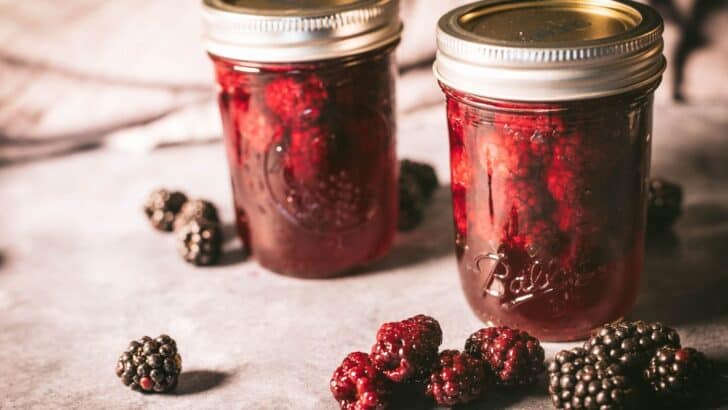
Canning blackberries is an excellent way to preserve this flavorful fruit for long-term storage that won't require a freezer. The fresh blackberries hold up well to the canning process and can be used just as you would use fresh fruit.

Everyone in my family loves blackberries. I freeze some, we make our fair share of homemade blackberry jam, and make some pie filling. But, my absolute favorite way to preserve these fruits is canning blackberries.
While you'd think they would get squishy during the canning process, surprisingly, they don't. They hold up super well and are still perfect for putting in baked goods like blackberry cobbler, topping your pancakes or ice cream, or however you choose to use them.
Like when canning strawberries, it's best to sacrifice a few of the blackberries to extract some of the juice. It just results in a more flavorful final product. In addition that the blackberry juice I extract from the berries, I add a touch of Framboise, which is brandy distilled from raspberries, to add a really amazing flavor.
That being said, you do not have to add any liquor if you do not choose to. Even after canning, the product will have a little alcohol content left and even if you bake these into something, you're still going to have a small amount of alcohol left. So, you don't have to add any if you want, or you can add some to some of the jars (which is typically what I do). It's not necessary to can blackberries, it just enhances the flavor.
Can blackberries be canned without sugar?
Unlike canning peaches, which don't taste very good canned without a bit of sugar, canning blackberries without any added sugar is possible. The best way to achieve a no sugar canned blackberry is to make sure you extract plenty of blackberry juice to preserve them in.
I don't recommend canning blackberries in just water (there won't be much flavor, the water will extract it), but you can definitely just can them in their own juices, a little of their juices, and some unsweetened apple juice, or some of their juice and some liquor as I mentioned above.
Canning Blackberries

This is a really easy recipe. So easy you'll be surprised at the flavor you get with the finished product (at least I always am). You'll need ripe blackberries, a bit of sugar (optional), some Framboise or other raspberry liquor (also optional), water, cinnamon sticks, lemon zest, fresh nutmeg, and extracted juice from some of the blackberries.
Blackberries can be safely canned in a boiling water canner in half-pints, pints, or quarts.
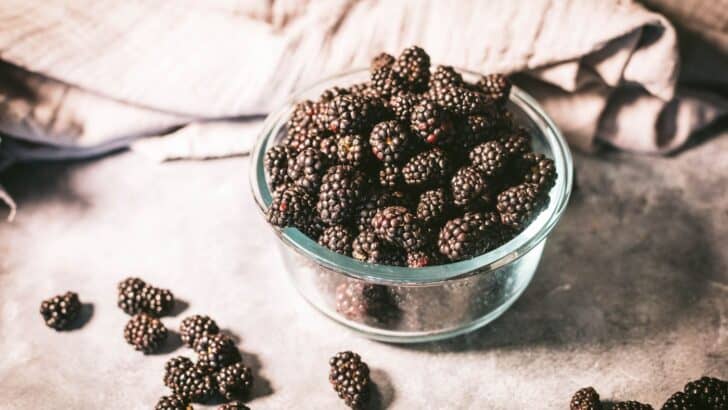
Wash fresh berries and drain. Wash blackberries in cold water. Remove any stems if necessary.
Extract juice from blackberries. Place two cups of whole blackberries in a saucepan and mash-up using a potato masher or wooden spoon. Add three tablespoons of water and cover them. Bring to a gentle boil over medium heat and boil until soft, about two minutes.

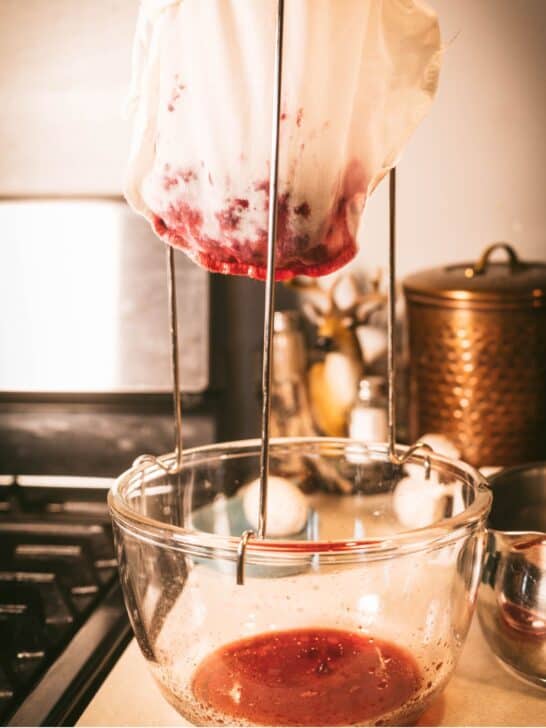
After the fruit is softened, place the mixture in a dampened jelly bag or cheesecloth and set over a bowl to collect a minimum of a half cup of blackberry juice. You can use the leftover blackberries for delicious blackberry jam still, they're not a total waste.
Prepare jars and water bath canner. While the juice is extracting, wash canning jars and lids in hot, soapy water, fill clean jars and canner with water, and begin heating the canner and jars over medium-high heat to 180°F and keep warm.
Make the syrup. Note that you can make this recipe and skip this step, but you will want to extract more juice to fill your jars or substitute fruit juice like unsweetened apple juice or white grape juice. To make the syrup combine two cups of sugar, cinnamon sticks, lemon zest, nutmeg and 2 cups of water in a large pot. Bring the mixture to a boil and boil continuously for 5 minutes.

Prepare the fruit. Strain the mixture and return it to the large saucepan. Add the blackberry juice, blackberries, and Framboise and bring to a full boil over medium-high heat, stirring constantly being careful to not crush the blackberries.
Pack the jars. Hot pack the jars with the blackberries by using a slotted spoon to drain the juice off, leaving a half inch of headspace at the top of the jar. Ladle hot syrup over the blackberries, allowing that same half inch headspace. Remove air bubbles and adjust for proper headspace, if necessary.
Wipe the rim with a damp cloth and center lid on the jar. Tighten the screw band to just finger tight and place jars in the waiting hot water bath.

Process the jars. Make sure the jars are covered with at least 1" of water, cover the canner and bring the water to a full rolling boil. Process half pints for 10 minutes, pint jars for 15 minutes, and quart jars for 20 minutes adjusting processing time for altitude if necessary.
After processing, turn off the heat and remove the canner lid. Wait for five minutes before removing the hot jars to a towel-lined counter. Leave the jars undisturbed for 12 to 24 hours before checking for proper seals. Remove rings from properly sealed jars and store in a cool, dark, and dry place, such as your pantry shelf, for up to 18 months.
📖 Recipe

Canning Blackberries in Framboise
Delicious and perfectly flavored, canning blackberries in raspberry liquor brings out a lot of flavor. However, the alcohol can be omitted if you choose.
Ingredients
- 6 Cups Fresh Blackberries, divided
- 2 Cups + 3 tablespoon Water, divided
- 2 Cups Sugar
- 2 Cinnamon Sticks (broken into pieces)
- 1 tablespoon Lemon Zest
- ½ teaspoon Whole Nutmeg
- ½ Cup Framboise
Instructions
- Wash fresh blackberries in cold water and drain. Remove any remaining stems if necessary.
- In a saucepan combine 2 cups of the blackberries with 3 tablespoons of water and mash the berries up with a potato masher. Cover the pan with a lid, bring to a gentle boil over medium heat and boil for two minutes, or until berries are soft.
- Pour berries into a dampened jelly bag or cheesecloth and extract at least a half cup of blackberry juice from them. Set the juice to the side.
- Prepare the jars and the water bath canner while the juice is extracting by washing the jars and lids in hot, soapy water. Fill the jars and the canner with water and bring everything to 180°F over medium-high heat.
- Next, make the syrup (optional, but recommended) by combining sugar, cinnamon sticks, lemon zest, nutmeg and two cups of water in a large pot. Boil the mixture over medium-high heat. Reduce heat and boil for five minutes, strain the mixture and return it to the pot. Add the extracted blackberry juice, the remaining four cups of blackberries, and the liquor if using. If you don't want to use liquor, you can substitute apple juice or white grape juice for it to make enough liquid while still enhancing the flavor.
- Bring the mixture to a boil, stirring constantly, but making sure to not crush the berries.
- Pack hot blackberries into the hot jars using a slotted spoon and leaving ½" of headspace. Top the berries with the hot syrup, leaving ½" of headspace. Remove any air bubbles and adjust for proper headspace if necessary.
- Wipe the rim of the jar with a damp cloth, center the lid, tighten down the ring to finger tight and place the jars back into the canner.
- Make sure jars are covered with at least 1" of water. Place the lid on the canner and bring the contents to a boil. Once boiling process half pint jars for 10 minutes, pint jars for 15 minutes, or quarts for 20 minutes adjusting for altitude if necessary (see notes).
- Once processing time has ended, turn off the heat and remove the lid from the canner but allow the jars to sit for five minutes before removing them to a towel-lined counter. Leave jars undisturbed for 12 to 24 hours before checking for proper seals.
- Store properly sealed jars, with the screw bands removed for up to 18 months in a cool, dark, and dry place.
Notes
Altitude adjustments:
0-1,000 ft Half Pints 10 Minutes, Pints 15 Minutes, Quarts, 20 Minutes
1,001 - 3,000 ft Half pints 15 minutes, Pints 20 Minutes, Quarts 25 Minutes
3,001 - 6,000 ft Half pints 20 minutes, Pints 25 Minutes, Quarts 30 Minutes
6,001 ft + Half pints 25 minutes, pints 30 minutes, quarts 35 minutes


Leave a Reply